
ViewPage源代码学习
本文涉及的源码下载地址
搞android开发的不可能没用过ViewPage,这个功能强大的控件是android独有的(IOS上没有这样的玩意儿,除了一些第三方的库)。一直都想研究ViewPage的源码,自己又很懒, 在百度上搜了搜,硬是没有一家写过这个,无奈,只能自己上来啃了。ViewPage继承自ViewGroup,所以我们在看ViewPage的代码的时候还是按照ViewGroup的功能逻辑来看。
首先自然是构造函数,没啥东西:
    void initViewPager() {
        setWillNotDraw(false);
        setDescendantFocusability(FOCUS_AFTER_DESCENDANTS);
        setFocusable(true);
        final Context context = getContext();
        mScroller = new Scroller(context, sInterpolator);
        final ViewConfiguration configuration = ViewConfiguration.get(context);
        final float density = context.getResources().getDisplayMetrics().density;

        mTouchSlop = ViewConfigurationCompat.getScaledPagingTouchSlop(configuration);
        mMinimumVelocity = (int) (MIN_FLING_VELOCITY * density);
        mMaximumVelocity = configuration.getScaledMaximumFlingVelocity();
        mLeftEdge = new EdgeEffectCompat(context);
        mRightEdge = new EdgeEffectCompat(context);

        mFlingDistance = (int) (MIN_DISTANCE_FOR_FLING * density);
        mCloseEnough = (int) (CLOSE_ENOUGH * density);
        mDefaultGutterSize = (int) (DEFAULT_GUTTER_SIZE * density);

        ViewCompat.setAccessibilityDelegate(this, new MyAccessibilityDelegate());

        if (ViewCompat.getImportantForAccessibility(this)
                == ViewCompat.IMPORTANT_FOR_ACCESSIBILITY_AUTO) {
            ViewCompat.setImportantForAccessibility(this,
                    ViewCompat.IMPORTANT_FOR_ACCESSIBILITY_YES);
        }
    }
第一句话意思根据android官方注释:如果这个view自己没有做任何的draw就设置这个为true,可以优化性能。默认为false,也就是需要调用onDraw方法。如果你覆写了onDraw,则必须清除(也就是false)这个标志。
第二句话设置焦点获取规则,这个就不详细说了,默认规则就是儿子都不要老子才要。
接下来创建了一个Scroller,用来处理滚动事件,这个需要先储备一下Scroller的用法和作用。
再接着感觉比较重要的就是ViewCompat.setAccessibilityDelegate(this, new MyAccessibilityDelegate());,这个具体作用现在还不清楚,后面再看。 其他的就是一些变量的初始化,我们进入下一步。在进入下一步之前我们需要知道ViewPage下一步是做什么?
一般来说一个activity或者fragment使用ViewPage,都是在通过XML文件inflate创建或者new出来之后添加到父View中,接着就是设置Adapter和监听器,甚至可以设置初始页面的索引。 最后在View将要绘制的时候才进入View的绘制消息传递(包含measure和layout传递等)。所以ViewPage第二个触发的应该是跟Adapter有关的函数。
    /**
     * Set a PagerAdapter that will supply views for this pager as needed.
     *
     * @param adapter Adapter to use
     */
    public void setAdapter(PagerAdapter adapter) {
        if (mAdapter != null) {
            mAdapter.unregisterDataSetObserver(mObserver);
            mAdapter.startUpdate(this);
            for (int i = 0; i < mItems.size(); i++) {
                final ItemInfo ii = mItems.get(i);
                mAdapter.destroyItem(this, ii.position, ii.object);
            }
            mAdapter.finishUpdate(this);
            mItems.clear();
            removeNonDecorViews();
            mCurItem = 0;
            scrollTo(0, 0);
        }

        final PagerAdapter oldAdapter = mAdapter;
        mAdapter = adapter;
        mExpectedAdapterCount = 0;

        if (mAdapter != null) {
            if (mObserver == null) {
                mObserver = new PagerObserver();
            }
            mAdapter.registerDataSetObserver(mObserver);
            mPopulatePending = false;
            final boolean wasFirstLayout = mFirstLayout;
            mFirstLayout = true;
            mExpectedAdapterCount = mAdapter.getCount();
            if (mRestoredCurItem >= 0) {
                mAdapter.restoreState(mRestoredAdapterState, mRestoredClassLoader);
                setCurrentItemInternal(mRestoredCurItem, false, true);
                mRestoredCurItem = -1;
                mRestoredAdapterState = null;
                mRestoredClassLoader = null;
            } else if (!wasFirstLayout) {
                populate();
            } else {
                requestLayout();
            }
        }

        if (mAdapterChangeListener != null && oldAdapter != adapter) {
            mAdapterChangeListener.onAdapterChanged(oldAdapter, adapter);
        }
    }
PageAdapter是一个抽象类,常用的一般是FragmentPageAdapter。PageAdapter里面有个DataSetObservable对象,而ViewPage中有个DataSetObserver的实现:PageObserver对象, 然后就把这个对象注册到PageAdapter的DataSetObservable对象中去,PageAdapter在调用notifyDataSetChanged的时候就会通知所以观察者调用onChange方法,在ViewPage中实现就是:
    private class PagerObserver extends DataSetObserver {
        @Override
        public void onChanged() {
            dataSetChanged();
        }
        @Override
        public void onInvalidated() {
            dataSetChanged();
        }
    }
前面if里面的一段代码,都是重置状态,startUpdate事实上啥都没做,android官方注释:当已经显示的页面将要有改变产生的时候调用。然而PageAdapter中并没有任何实现,FragmentPageAdapter也是如此。
接着一个循环,首次进入必然不会执行。然后是finishUpdate,与startUpdate成对出现,这个在抽象类中没有任何卵用,但是在FragmentPageAdapter覆写了,总结一下就是:
这个方法里面应该把页面变换的动画立马执行结束。然后是移除所有非Decor的View,也可以忽略,接着默认页面索引为0,滚动到0,0也就是原点位置。接着才是初始化操作,注册PagerObserver,
初始化一些状态变量。需要注意的是1
mRestoredCurItem>=0
我们跟着调用逻辑走下去,进入requestLayout();额……具体代码就不看了,反正意思就是要发起一次layout传递。由此也就解释了为何首次设置adapter后不需要调用notifiydatachanged方法。
下面应该就是进入measure方法了。额……没找到,没关系,measure里面会调用onMeasure,这个才是android真正让用户自定义测量的地方。
第一句话自然是setMeasuredDimension(getDefaultSize(0, widthMeasureSpec),getDefaultSize(0, heightMeasureSpec));,获取父亲给自己在measure中计算出的大小,然后就是一系列计算儿子的大小:
      /*
         * Make sure all children have been properly measured. Decor views first.
         * Right now we cheat and make this less complicated by assuming decor
         * views won't intersect. We will pin to edges based on gravity.
         */
        int size = getChildCount();
        for (int i = 0; i < size; ++i) {
            final View child = getChildAt(i);
            if (child.getVisibility() != GONE) {
                final LayoutParams lp = (LayoutParams) child.getLayoutParams();
                if (lp != null && lp.isDecor) {
                    final int hgrav = lp.gravity & Gravity.HORIZONTAL_GRAVITY_MASK;
                    final int vgrav = lp.gravity & Gravity.VERTICAL_GRAVITY_MASK;
                    int widthMode = MeasureSpec.AT_MOST;
                    int heightMode = MeasureSpec.AT_MOST;
                    boolean consumeVertical = vgrav == Gravity.TOP || vgrav == Gravity.BOTTOM;
                    boolean consumeHorizontal = hgrav == Gravity.LEFT || hgrav == Gravity.RIGHT;

                    if (consumeVertical) {
                        widthMode = MeasureSpec.EXACTLY;
                    } else if (consumeHorizontal) {
                        heightMode = MeasureSpec.EXACTLY;
                    }

                    int widthSize = childWidthSize;
                    int heightSize = childHeightSize;
                    if (lp.width != LayoutParams.WRAP_CONTENT) {
                        widthMode = MeasureSpec.EXACTLY;
                        if (lp.width != LayoutParams.FILL_PARENT) {
                            widthSize = lp.width;
                        }
                    }
                    if (lp.height != LayoutParams.WRAP_CONTENT) {
                        heightMode = MeasureSpec.EXACTLY;
                        if (lp.height != LayoutParams.FILL_PARENT) {
                            heightSize = lp.height;
                        }
                    }
                    final int widthSpec = MeasureSpec.makeMeasureSpec(widthSize, widthMode);
                    final int heightSpec = MeasureSpec.makeMeasureSpec(heightSize, heightMode);
                    child.measure(widthSpec, heightSpec);

                    if (consumeVertical) {
                        childHeightSize -= child.getMeasuredHeight();
                    } else if (consumeHorizontal) {
                        childWidthSize -= child.getMeasuredWidth();
                    }
                }
            }
        }
看这段代码的逻辑隐约猜测这不是真正的在计算viewpage内容的大小,而是在计算viewpage除去其他控件后可供作为page页面容器的空间大小。因为getChildCount这个时候返回的只是已经添加进viewpage的子view个数, 而我们这个时候page页面还没有加进去。先暂时摆在一边,继续看下去:
        mChildWidthMeasureSpec = MeasureSpec.makeMeasureSpec(childWidthSize, MeasureSpec.EXACTLY);
        mChildHeightMeasureSpec = MeasureSpec.makeMeasureSpec(childHeightSize, MeasureSpec.EXACTLY);

        // Make sure we have created all fragments that we need to have shown.
        mInLayout = true;
        populate();
        mInLayout = false;
正如我所说,减去了已经存在的子view的控件后,剩下的才是page的空间,populate应该会涉及到adapter的一些接口了。我跟进去发现populate调用了populate(mCurItem); 意思应该是只对当前显示的页面做populate处理,这段代码比较长,我们需要分段来看:
        ItemInfo oldCurInfo = null;
        int focusDirection = View.FOCUS_FORWARD;
        if (mCurItem != newCurrentItem) {
            focusDirection = mCurItem < newCurrentItem ? View.FOCUS_RIGHT : View.FOCUS_LEFT;
            oldCurInfo = infoForPosition(mCurItem);
            mCurItem = newCurrentItem;
        }
         if (mAdapter == null) {
            sortChildDrawingOrder();
            return;
        }
由于我们是初始化,所以第一个if里面不会进去。然后判断adapter是否为空,如果是空就把现有的子view排序,规则参见ViewPositionComparator。一般情况下这个排序也是白扯, 我们不会在viewpage里面添加什么装饰view(就是继承了ViewPage内部定义的接口的类,反正我是没见过有这样的view):
    /**
     * Used internally to tag special types of child views that should be added as
     * pager decorations by default.
     */
    interface Decor {}
再接着就比较难理解了,这里还是把android的注释一起贴出来:
       // Bail now if we are waiting to populate.  This is to hold off
        // on creating views from the time the user releases their finger to
        // fling to a new position until we have finished the scroll to
        // that position, avoiding glitches from happening at that point.
        if (mPopulatePending) {
            if (DEBUG) Log.i(TAG, "populate is pending, skipping for now...");
            sortChildDrawingOrder();
            return;
        }

        // Also, don't populate until we are attached to a window.  This is to
        // avoid trying to populate before we have restored our view hierarchy
        // state and conflicting with what is restored.
        if (getWindowToken() == null) {
            return;
        }

        mAdapter.startUpdate(this);
找了半天mPopulatePending,发现只有在处理ACTION_UP事件和endFakeDrag函数中才会被设置为true。endFakeDrag的职能需要看beginFakeDrag的注释,大概用途就是同步与其他可滑动页面的状态。 比如我们有两个viewpage,想要达到同时滑动的效果,就在其中一个viewpage滑动的时候调用另一个viewpage的fakedrag系列方法以达到同步效果。 但是不管是ACTION_UP还是endFakeDrag都是表示滑动停止,滑动停止后我们的populate函数就沦为了排序?写到这里的时候我也没找到答案,隐约感觉不对劲,但是还是继续往下走。
下面的意思就是在view还没有添加到窗口上时就不走下去了,这里我们需要知道一个view的生命周期: 构造View –> onFinishInflate –> onAttachedToWindow –> onMeasure –> onSizeChanged –> onLayout –> onDraw –> onDetackedFromWindow 再接着 mAdapter.startUpdate(this)这句代码我们上面就说过,并没有什么卵用。
        final int pageLimit = mOffscreenPageLimit;
        final int startPos = Math.max(0, mCurItem - pageLimit);
        final int N = mAdapter.getCount();
        final int endPos = Math.min(N-1, mCurItem + pageLimit);

        if (N != mExpectedAdapterCount) {
            String resName;
            try {
                resName = getResources().getResourceName(getId());
            } catch (Resources.NotFoundException e) {
                resName = Integer.toHexString(getId());
            }
            throw new IllegalStateException("The application's PagerAdapter changed the adapter's" +
                    " contents without calling PagerAdapter#notifyDataSetChanged!" +
                    " Expected adapter item count: " + mExpectedAdapterCount + ", found: " + N +
                    " Pager id: " + resName +
                    " Pager class: " + getClass() +
                    " Problematic adapter: " + mAdapter.getClass());
        }
这一段获取正确的需要初始化的页面起始位置和结束位置。根据我们设置的缓存大小,最大初始化不超过N个页面。然后if里面的错误原因说明很清晰了,改了adapter的数据而没有 调用notifyDataSetChanged方法就有可能出现。
        // Locate the currently focused item or add it if needed.
        int curIndex = -1;
        ItemInfo curItem = null;
        for (curIndex = 0; curIndex < mItems.size(); curIndex++) {
            final ItemInfo ii = mItems.get(curIndex);
            if (ii.position >= mCurItem) {
                if (ii.position == mCurItem) curItem = ii;
                break;
            }
        }

        if (curItem == null && N > 0) {
            curItem = addNewItem(mCurItem, curIndex);
        }
正如注释所说,找到当前获得焦点的页面对象,没有就添加进去,很显然,咱们的页面初始化代码出现了。
    ItemInfo addNewItem(int position, int index) {
        ItemInfo ii = new ItemInfo();
        ii.position = position;
        ii.object = mAdapter.instantiateItem(this, position);
        ii.widthFactor = mAdapter.getPageWidth(position);
        if (index < 0 || index >= mItems.size()) {
            mItems.add(ii);
        } else {
            mItems.add(index, ii);
        }
        return ii;
    }
最核心的就是mAdapter.instantiateItem(this, position);和mAdapter.getPageWidth(position);这两个函数了。mAdapter.getPageWidth(position);比较简单, 意思是页面占用viewpage的宽度的百分比,默认都是100%,然后看instantiateItem这个函数。instantiateItem是adapter必须实现的方法,默认实现:
    /**
     * Create the page for the given position.  The adapter is responsible
     * for adding the view to the container given here, although it only
     * must ensure this is done by the time it returns from
     * {@link #finishUpdate(ViewGroup)}.
     *
     * @param container The containing View in which the page will be shown.
     * @param position The page position to be instantiated.
     * @return Returns an Object representing the new page.  This does not
     * need to be a View, but can be some other container of the page.
     */
    public Object instantiateItem(ViewGroup container, int position) {
        return instantiateItem((View) container, position);
    }
    /**
     * Create the page for the given position.  The adapter is responsible
     * for adding the view to the container given here, although it only
     * must ensure this is done by the time it returns from
     * {@link #finishUpdate(ViewGroup)}.
     *
     * @param container The containing View in which the page will be shown.
     * @param position The page position to be instantiated.
     * @return Returns an Object representing the new page.  This does not
     * need to be a View, but can be some other container of the page.
     *
     * @deprecated Use {@link #instantiateItem(ViewGroup, int)}
     */
    public Object instantiateItem(View container, int position) {
        throw new UnsupportedOperationException(
                "Required method instantiateItem was not overridden");
    }
简直没天理,直接报错……而且让我们使用instantiateItem(ViewGroup, int),好在我们常用的FragmentPageAdapter里已经实现了:
    @Override
    public Object instantiateItem(ViewGroup container, int position) {
        if (mCurTransaction == null) {
            mCurTransaction = mFragmentManager.beginTransaction();
        }

        final long itemId = getItemId(position);

        // Do we already have this fragment?
        String name = makeFragmentName(container.getId(), itemId);
        Fragment fragment = mFragmentManager.findFragmentByTag(name);
        if (fragment != null) {
            if (DEBUG) Log.v(TAG, "Attaching item #" + itemId + ": f=" + fragment);
            mCurTransaction.attach(fragment);
        } else {
            fragment = getItem(position);
            if (DEBUG) Log.v(TAG, "Adding item #" + itemId + ": f=" + fragment);
            mCurTransaction.add(container.getId(), fragment,
                    makeFragmentName(container.getId(), itemId));
        }
        if (fragment != mCurrentPrimaryItem) {
            fragment.setMenuVisibility(false);
            fragment.setUserVisibleHint(false);
        }

        return fragment;
    }
这个实现只是适合Fragment,出现了fragment特有的manager和transaction对象,但是中心思想还是一致的,就是要创建一个页面的容器对象,根据android官方注释,生成并返回的这个对象, 需要添加到ViewGroup中去,可以看到代码里确实有这句:mCurTransaction.add(container.getId(), fragment, makeFragmentName(container.getId(), itemId)); 这里也解释了我心中的疑问,这个函数并没有限制返回对象一定需要是view或者fragment,所以理论上我们可以任意创建对象。
接着走我们的populate函数:
        // Fill 3x the available width or up to the number of offscreen
        // pages requested to either side, whichever is larger.
        // If we have no current item we have no work to do.
        if (curItem != null) {
            float extraWidthLeft = 0.f;
            int itemIndex = curIndex - 1;
            ItemInfo ii = itemIndex >= 0 ? mItems.get(itemIndex) : null;
            final int clientWidth = getClientWidth();
            final float leftWidthNeeded = clientWidth <= 0 ? 0 :
                    2.f - curItem.widthFactor + (float) getPaddingLeft() / (float) clientWidth;
            for (int pos = mCurItem - 1; pos >= 0; pos--) {
                if (extraWidthLeft >= leftWidthNeeded && pos < startPos) {
                    if (ii == null) {
                        break;
                    }
                    if (pos == ii.position && !ii.scrolling) {
                        mItems.remove(itemIndex);
                        mAdapter.destroyItem(this, pos, ii.object);
                        if (DEBUG) {
                            Log.i(TAG, "populate() - destroyItem() with pos: " + pos +
                                    " view: " + ((View) ii.object));
                        }
                        itemIndex--;
                        curIndex--;
                        ii = itemIndex >= 0 ? mItems.get(itemIndex) : null;
                    }
                } else if (ii != null && pos == ii.position) {
                    extraWidthLeft += ii.widthFactor;
                    itemIndex--;
                    ii = itemIndex >= 0 ? mItems.get(itemIndex) : null;
                } else {
                    ii = addNewItem(pos, itemIndex + 1);
                    extraWidthLeft += ii.widthFactor;
                    curIndex++;
                    ii = itemIndex >= 0 ? mItems.get(itemIndex) : null;
                }
            }

            float extraWidthRight = curItem.widthFactor;
            itemIndex = curIndex + 1;
            if (extraWidthRight < 2.f) {
                ii = itemIndex < mItems.size() ? mItems.get(itemIndex) : null;
                final float rightWidthNeeded = clientWidth <= 0 ? 0 :
                        (float) getPaddingRight() / (float) clientWidth + 2.f;
                for (int pos = mCurItem + 1; pos < N; pos++) {
                    if (extraWidthRight >= rightWidthNeeded && pos > endPos) {
                        if (ii == null) {
                            break;
                        }
                        if (pos == ii.position && !ii.scrolling) {
                            mItems.remove(itemIndex);
                            mAdapter.destroyItem(this, pos, ii.object);
                            if (DEBUG) {
                                Log.i(TAG, "populate() - destroyItem() with pos: " + pos +
                                        " view: " + ((View) ii.object));
                            }
                            ii = itemIndex < mItems.size() ? mItems.get(itemIndex) : null;
                        }
                    } else if (ii != null && pos == ii.position) {
                        extraWidthRight += ii.widthFactor;
                        itemIndex++;
                        ii = itemIndex < mItems.size() ? mItems.get(itemIndex) : null;
                    } else {
                        ii = addNewItem(pos, itemIndex);
                        itemIndex++;
                        extraWidthRight += ii.widthFactor;
                        ii = itemIndex < mItems.size() ? mItems.get(itemIndex) : null;
                    }
                }
            }

            calculatePageOffsets(curItem, curIndex, oldCurInfo);
        }
从注释看,说是填满至少3个页面的内容,如果需要的缓存页面更多则填满更多,代码里面getClientWidth();获取的是一个页面的宽度,这个宽度与page页面真实的宽无关,而是viewpage根据自己可显示内容区域大小来确定。 第一个for循环,遍历当前页面的左边,break的条件是两个:extraWidthLeft(应该就是说已经创建的页面)要大于需求的宽度leftWidthNeeded;pos已经超过了需要缓存的索引,也就是pos < startPos; 满足上面两个条件后发现左边还有页面对象可以实例化,但是我们不需要了,就会break。
下面我们进入循环看看,首次进入肯定会执行最后面的分支:
                    ii = addNewItem(pos, itemIndex + 1);
                    extraWidthLeft += ii.widthFactor;
                    curIndex++;
                    ii = itemIndex >= 0 ? mItems.get(itemIndex) : null;
我们需要搞清楚itemIndex是什么,int itemIndex = curIndex - 1;而curIndex代表的意思是当前view应该插入的位置。在我们初始化的时候curIndex=0,因此itemIndex = -1, addNewItem传入的两个参数,第一个pos表示页面索引,第二个itemIndex表示页面在ViewPage的mItems容器中的索引,如果itemIndex的值合理则插入的索引就是itemIndex,否则直接添加到队尾。 至于这个在mItems容器中的顺序有何说法我们后面再看。
到最后一句的时候,由于itemIndex = -1,ii赋值null。然后进入第二次循环,可以看到第一个if里面的条件都成立,并且ii=null,直接跳出循环。
这里我们不妨假设current!=0,并且我们的mItems里面已经缓存了很多页面的内容。不难看出我们会找到所有左边的缓存,当我们需要的缓存都找到或者创建出来后,会进入:
                 if (pos == ii.position && !ii.scrolling) {
                        mItems.remove(itemIndex);
                        mAdapter.destroyItem(this, pos, ii.object);
                        if (DEBUG) {
                            Log.i(TAG, "populate() - destroyItem() with pos: " + pos +
                                    " view: " + ((View) ii.object));
                        }
                        itemIndex--;
                        curIndex--;
                        ii = itemIndex >= 0 ? mItems.get(itemIndex) : null;
                    }
这个分支会把所有左边多余的分支删除销毁。
对称的,我们还需要处理当前页面的右边内容。与左边不同的是计算rightWidthNeeded的时候,我们可以看到leftWidthNeeded基本是等于1.0f的,而rightWidthNeeded等于2.0f,正如我们最一开始所说的, 至少需要缓存3x的页面内容,但是这个分配默认是不对称的左1x右2x。在我们把currentItem以及左右缓存都准备好了后进入下一句:
calculatePageOffsets(curItem, curIndex, oldCurInfo);对于初始化来说可以直接变成:
calculatePageOffsets(curItem, 0, null);calculatePageOffsets也是一个比较复杂的函数,本来我们不需要看前面第一个if里面的逻辑,因为oldCurInfo是null。但是当我们不是初始化的时候,calculatePageOffsets又干了什么呢?
首先判断oldCurInfo是在curItem哪一侧,这里左右其实对称的操作,我们假设是在左侧。 然后对oldCurInfo和curItem之间(包含curItem)的item进行遍历,统计每一个item的offset(这个offset是相对oldCurInfo来计算的)。 这个过程就涉及到我们上面说的如果addNewItem的pos和itemIndex不一致的情况。calculatePageOffsets函数是这么处理的:
                    while (pos > ii.position && itemIndex < mItems.size() - 1) {
                        itemIndex++;
                        ii = mItems.get(itemIndex);
                    }
                    while (pos < ii.position) {
                        // We don't have an item populated for this,
                        // ask the adapter for an offset.
                        offset += mAdapter.getPageWidth(pos) + marginOffset;
                        pos++;
                    }
第一个while按照mItems里面的顺序找到pos右边(包含pos)的一个item,第二个while判断如果找到的item的position值不是pos,这说明这两个position之间的item我们没有创建 (不一定是没创建,但是如果我们在addNewItem的时候pos和itemIndex不是同升同降的话就有可能会出现这种情况,这也是为何每次dataSetChanged都会对mItems排序的原因吧), 我们需要问adapter如何计算offset。
正当我沾沾自喜看懂了第一段代码是计算oldCurInfo和curItem的position值之间的对应的item的基于oldCurInfo的offset后,下面一段代码就像给我一大嘴巴,下面的代码正如注释所说, 计算基于curItem的每个page的offset
        // Base all offsets off of curItem.
        final int itemCount = mItems.size();
        float offset = curItem.offset;
        int pos = curItem.position - 1;
        mFirstOffset = curItem.position == 0 ? curItem.offset : -Float.MAX_VALUE;
        mLastOffset = curItem.position == N - 1 ?
                curItem.offset + curItem.widthFactor - 1 : Float.MAX_VALUE;
        // Previous pages
        for (int i = curIndex - 1; i >= 0; i--, pos--) {
            final ItemInfo ii = mItems.get(i);
            while (pos > ii.position) {
                offset -= mAdapter.getPageWidth(pos--) + marginOffset;
            }
            offset -= ii.widthFactor + marginOffset;
            ii.offset = offset;
            if (ii.position == 0) mFirstOffset = offset;
        }
        offset = curItem.offset + curItem.widthFactor + marginOffset;
        pos = curItem.position + 1;
        // Next pages
        for (int i = curIndex + 1; i < itemCount; i++, pos++) {
            final ItemInfo ii = mItems.get(i);
            while (pos < ii.position) {
                offset += mAdapter.getPageWidth(pos++) + marginOffset;
            }
            if (ii.position == N - 1) {
                mLastOffset = offset + ii.widthFactor - 1;
            }
            ii.offset = offset;
            offset += ii.widthFactor + marginOffset;
        }

        mNeedCalculatePageOffsets = false;
也就是说到这儿,curItem的offset是基于oldCurInfo算出来的,然后其他的item的offset都是基于curItem算出来的。这是在弄啥咧??我们继续回到populate的代码中去:
        mAdapter.setPrimaryItem(this, mCurItem, curItem != null ? curItem.object : null);
        mAdapter.finishUpdate(this);
默认实现为空,意思就是通知Page你已经成为了主page,即将要显示,做点什么吧。FragmentPageAdapter实现如下:
    @Override
    public void setPrimaryItem(ViewGroup container, int position, Object object) {
        Fragment fragment = (Fragment)object;
        if (fragment != mCurrentPrimaryItem) {
            if (mCurrentPrimaryItem != null) {
                mCurrentPrimaryItem.setMenuVisibility(false);
                mCurrentPrimaryItem.setUserVisibleHint(false);
            }
            if (fragment != null) {
                fragment.setMenuVisibility(true);
                fragment.setUserVisibleHint(true);
            }
            mCurrentPrimaryItem = fragment;
        }
    }
相信大家都不陌生,设置了fragment的menu和visible状态。最后populate还有一段代码:
        // Check width measurement of current pages and drawing sort order.
        // Update LayoutParams as needed.
        final int childCount = getChildCount();
        for (int i = 0; i < childCount; i++) {
            final View child = getChildAt(i);
            final LayoutParams lp = (LayoutParams) child.getLayoutParams();
            lp.childIndex = i;
            if (!lp.isDecor && lp.widthFactor == 0.f) {
                // 0 means requery the adapter for this, it doesn't have a valid width.
                final ItemInfo ii = infoForChild(child);
                if (ii != null) {
                    lp.widthFactor = ii.widthFactor;
                    lp.position = ii.position;
                }
            }
        }
        sortChildDrawingOrder();

        if (hasFocus()) {
            View currentFocused = findFocus();
            ItemInfo ii = currentFocused != null ? infoForAnyChild(currentFocused) : null;
            if (ii == null || ii.position != mCurItem) {
                for (int i=0; i<getChildCount(); i++) {
                    View child = getChildAt(i);
                    ii = infoForChild(child);
                    if (ii != null && ii.position == mCurItem) {
                        if (child.requestFocus(focusDirection)) {
                            break;
                        }
                    }
                }
            }
        }
第一段正如注释所说,更新当前viewpage上面所有子view的LayoutParam信息,然后对他们进行排序,这里的顺序是绘制顺序,规则就是先按照position顺序绘制page,最后绘制Decor对象, 具体参见ViewPositionComparator的定义。后面一段是焦点的处理,究竟应该是谁来获得焦点,infoForAnyChild(currentFocused)很有意思, 这个函数获取的应该是currentFocused这个view所在的page的iteminfo对象,这样来判断焦点是否处于同一个page没变化,否则就需要遍历所有子view来寻找下一个焦点应该在哪儿。 具体寻找焦点的代码比较复杂,层级太深,这里就不跟进去了,以后有时间专门研究一次child.requestFocus(focusDirection)是怎么找到正确的应该获取焦点的view的。
OK,我们终于从populate中出来了,继续回到onMeasure,onMeasure也还剩最后一段:
        // Page views next.
        size = getChildCount();
        for (int i = 0; i < size; ++i) {
            final View child = getChildAt(i);
            if (child.getVisibility() != GONE) {
                if (DEBUG) Log.v(TAG, "Measuring #" + i + " " + child
                        + ": " + mChildWidthMeasureSpec);

                final LayoutParams lp = (LayoutParams) child.getLayoutParams();
                if (lp == null || !lp.isDecor) {
                    final int widthSpec = MeasureSpec.makeMeasureSpec(
                            (int) (childWidthSize * lp.widthFactor), MeasureSpec.EXACTLY);
                    child.measure(widthSpec, mChildHeightMeasureSpec);
                }
            }
        }
我百思不得其解if (lp == null || !lp.isDecor)为何不会出错,如果lp为null,里面的 lp.widthFactor不会报空指针异常的错误么,不过抛开这个疑问,代码的主要功能就是测量子view, 与一般的viewgroup一致。
Android UDP服务
已经有的轮子:KryoNet
KryoNet is a Java library that provides a clean and simple API for efficient TCP and UDP client/server network communication using NIO. KryoNet uses the Kryo serialization library to automatically and efficiently transfer object graphs across the network.
正如KryoNet的描述,这个框架已经提供了可用的udp服务器和客户端实现,但是使用的是Kryo来做字节的序列化和反序列化。 我只是想要一个UDP服务器的demo,不想绑定Kryo,而且由于项目需求,字节码解析协议需要定制,于是就有了这篇博客。
一个完整的UDP服务器Demo应该有什么?
先帖一发代码库。这里使用的bibucket建仓库,实在是点不开github… 一个完整的UDP服务器应该能做到下面的事情:
Server端:
- 端口监听。防止dos攻击、报文过滤等等都应该做在这一层。
- 连接池。接收到UDP报文后肯定需要创建连接然后发送ACK或者其他数据,如果不考虑性能,连接池可以省略,我的demo里面也没有实现,都是直接new出来的。
- 连接记录。虽然都说UDP是无连接的协议,但是大部分需求都是需要记录UDP连接的,这样才能发送广播之类的消息;同时如果想要使用UDP来实现一套IM系统,肯定还是需要连接记录的。
- 数据解析处理。
- 可靠的数据传递。(超时重发、超重发次数离线)
- 心跳检测。独立的线程遍历连接记录,发现有心跳超时的记录就”断开连接”,连接池回收。
Client端:
- 端口监听。逻辑跟服务器一样一样。
- 建立连接。不要以为UDP服务无连接就不需要这一步,一般都是发送一个心跳包,等待服务器的ACK,如果等到了就说明链路通了,否则需要提示用户无法建立连接
- 可靠的数据传递。超时重发、超重发次数离线并且重连、超重连次数通知上层逻辑处理。
- 数据解析处理。
- 心跳。
目前我的Demo里面实现的功能很简陋,Server端什么都没有,收到消息直接返回ACK。这个Server本身也只是在项目中用来测试客户端是否正确,并没有花时间来做。Client端相对丰满点,实现了:
- 端口监听。没有防DOS攻击等复杂逻辑,简单地收取报文。
- 建立连接。
- 可靠的数据传递。只做了超时重发、超重发次数重连,没有保存本地数据库。
- 数据解析处理。
- 心跳
UDP连接框架

首先需要熟悉下Java里面的NIO,有一个对应的翻译,最主要的是要看到第9篇, 这样就知道了如果搭建一个简单地UDP服务器了。 这些最基础的UDP连接,对应封装在UDPConnection类中:
public class UDPConnection {
    InetSocketAddress connectedAddress;
    DatagramChannel datagramChannel;
    final ByteBuffer readBuffer, writeBuffer;
    private final Serialization serialization;
    private SelectionKey selectionKey;
    private final Object writeLock = new Object();
    ......
}
从成员变量里面就可以看出来,与NIO的教程里面说的一样有三个角色:buffer、Channel和SelectionKey。同时还有另一个角色:Serialization,也就是我们下面着重会讲的数据解析协议,这个类规定了
- 如何从ByteBuffer转化为我们需要的Java对象
- 如何从Java对象转化为ByteBuffer
    public UDPConnection(Serialization serialization, int writeBufferSize, int objectBufferSize) {
        this.serialization = serialization;
        readBuffer = ByteBuffer.allocate(objectBufferSize);
        writeBuffer = ByteBuffer.allocateDirect(writeBufferSize);
    }

    public void bind(Selector selector, InetSocketAddress localPort) throws IOException {
        close();
        readBuffer.clear();
        writeBuffer.clear();
        try {
            datagramChannel = selector.provider().openDatagramChannel();
            datagramChannel.socket().bind(localPort);
            datagramChannel.configureBlocking(false);
            selectionKey = datagramChannel.register(selector, SelectionKey.OP_READ);
        } catch (IOException ex) {
            close();
            throw ex;
        }
    }
先看构造函数和bind。构造函数中传入了具体的Serialization,以及各个缓存的大小。 bind函数作用就是在给定的端口上监听UDP报文,这里使用selector.provider().openDatagramChannel()而不是DatagramChannel.open()还是有一点区别的,方便了我们扩展代码。
    public void connect(Selector selector, InetSocketAddress remoteAddress) throws IOException {
        close();
        readBuffer.clear();
        writeBuffer.clear();
        try {
            datagramChannel = selector.provider().openDatagramChannel();
            datagramChannel.configureBlocking(false);
            datagramChannel.socket().bind(null);
            datagramChannel.socket().connect(remoteAddress);
            selectionKey = datagramChannel.register(selector, SelectionKey.OP_READ);
            connectedAddress = remoteAddress;
        } catch (Exception ex) {
            close();
            IOException ioEx = new IOException("Unable to connect to: " + remoteAddress);
            ioEx.initCause(ex);
            throw ioEx;
        }
}看到这个方法可能会让人有点困惑,UDP是无连接的,为何还会有connect方法?这里的connect并不是TCP中的建立连接的意思,而是把Channel与该地址绑定,这样以后写数据的时候就会默认写给connect中传入的地址。具体描述可参见官方文档
       public InetSocketAddress readFromAddress() throws IOException {
            DatagramChannel datagramChannel = this.datagramChannel;
            if (datagramChannel == null) throw new SocketException("ConnectionWrapper is closed.");
            if (!datagramChannel.isConnected())
                return (InetSocketAddress) datagramChannel.receive(readBuffer); // always null on Android >= 5.0
            datagramChannel.read(readBuffer);
            return connectedAddress;
        }

        public PacketMessage readObject() {
            readBuffer.flip();
            try {
                try {
                    PacketMessage object = serialization.read(readBuffer);
                    if (readBuffer.hasRemaining())
                        throw new Exception("Incorrect number of bytes (" + readBuffer.remaining()
                                + " remaining) used to deserialize object: " + object);
                    if (DEBUG) info("readObject object : " + object.getClass().getName());
                    return object;
                } catch (Exception ex) {
                    throw new RuntimeException("Error during deserialization.", ex);
                }
            } finally {
                readBuffer.clear();
            }
        }

        /**
         * This method is thread safe.
         */
        public int send(PacketMessage object, SocketAddress address) throws IOException {
            DatagramChannel datagramChannel = this.datagramChannel;
            if (datagramChannel == null) throw new SocketException("ConnectionWrapper is closed.");
            synchronized (writeLock) {
                try {
                    try {
                        if (DEBUG) info("send object : " + object.getClass().getName());
                        serialization.write(writeBuffer, object);
                    } catch (Exception ex) {
                        throw new RuntimeException("Error serializing object of type: " + object.getClass().getName(), ex);
                    }
                    writeBuffer.flip();
                    int length = writeBuffer.limit();
                    datagramChannel.send(writeBuffer, address);
                    boolean wasFullWrite = !writeBuffer.hasRemaining();
                    return wasFullWrite ? length : -1;
                } finally {
                    writeBuffer.clear();
                }
            }
        }
这三个方法中readFromAddress是从通道中读取数据到ByteBuffer,readObject使用规定的Serialization从ByteBuffer转为Java对象,send将Java对象写入通道。有了这些基础方法后就可以在上层设计UDP连接框架了。
这里使用了静态代理的设计思路,UDPConnection是IConnection的一个实现,ConnectionWrapper是IConnection的一个代理;ConnectionWrapper中使用的是UDPConnection的实现。ConnectionWrapper中还有一个属性是EndPoint类型的对象,ConnectionWrapper中主要使用的是EndPoint的reconnect实现。
EndPoint定义了一个UDP端的控制接口。
- Serialization getSerialization(); 获取数据序列化的实现
- addListener(Listener listener); 添加上面所说的五中状态的监听
- removeListener(Listener listener);删除状态监听
- run();继承的Runnable,读取消息的循环,运行在独立线程中
- reconnect();重连
- start();开启一个线程运行run()
- stop();停止run()并重置Selector状态
- close();状态置为关闭,关闭通道,重置Selector
- update(int timeout);读取一次数据的实现,run中会循环调用该方法
- getUpdateThread();获取读取数据的线程,这是为了判断建立连接的线程与读取数据的线程是否相同,建立连接的过程会block线程,因此不能使用同一个线程,否则会卡死。
这些接口里面只有1、2、3、5、6、7、8是提供给外部控制Client状态的。
下面我们来走一遍建立连接的过程:
-
创建Client
client = new Client() {};
-
配置状态回调,启动Client,开始监听UDP报文
client.start();
client.addListener(new com.transport.Listener());
-
开启另一个线程开始连接服务器
   new Thread("Connect") {
       public void run() {
           try {
               client.connect(host, Integer.parseInt(port));
           } catch (IOException ex) {
               ex.printStackTrace();
               System.exit(1);
           }
       }
   }.start();
需要注意的是必须要先启动Client后在建立连接,因为我们这里建立连接做的事情是1.给Channel绑定服务器的地址 2.给服务器发送一个心跳包,然后block线程,等待心跳ACK,超时断开连接;收到ACK唤醒线程,通知状态监听
服务器的逻辑与之类似:
-
创建Server
server = new Server() {};
-
配置状态回调,启动Client,开始监听UDP报文,收到报文后默认返回ACK
server.addListener(new Listener());
server.start();
-
绑定端口,服务器没有建立连接的步骤,不会造成线程block
server.bind(54555);
可靠地数据传输
要实现可靠地数据传输需要实现两个特性:1.断线重连 2.数据包ACK,超时重发 3.心跳
断线重连
断线重连发生在下面几种情况下:
- 从通道读取数据失败。我们认为数据通道被破坏了,需要重新创建。
- ACK检查时发现了超出重发次数的数据包。我们认为服务器失联了,需要重联,确认连接可用。
- 发送数据包失败。与1一样,认为数据通道破坏了。
对应的代码调用可以全局搜索reconnect();的调用
超时重发
上面在介绍EndPoint的时候说过了update(int timeout),运行在独立的线程中,这个方法做了3件事情:
- 检测Selector是否有数据通道处于ready状态,如果有,进入读取数据的逻辑。
- 检测并发送心跳包。
- 检测等待ACK的包,是否有等待的包超时了,有并且已经超出重发次数上线,重连;没有超出重发次数上线则重发数据包,并将该数据包移出等待ACK的列表。
我们在发送数据包时,需要将每一个发送成功的数据包保存在等待ACK的列表中,在收到了对应的ACK后才能将之移除;重连时需要把还在等待ACK的数据包重发一次。
心跳
心跳也是在update函数中检测的,目前定义的是一分钟一次,在update函数中判断距离上次发送心跳的时间,到了一分钟就发送一次心跳,然后重置最近一次发送心跳的时间。这里需要注意的 是重置发送心跳的时间是写在发送数据包的函数中的,因为我们有可能会出现心跳包重发的情况,因此在发送数据包的时候来判断是否属心跳包,以此为依据来更新最新一次数据包的发送时间。 重连的时候不会发送还在等待ACK的心跳包,心跳包会直接抛弃。
数据解析协议
首先需要看下序列化接口的定义:
public interface Serialization {

    void write(ByteBuffer buffer, PacketMessage packet);

    PacketMessage read(ByteBuffer buffer);

    /**
     * The fixed number of bytes that will be written by {@link #writeLength(ByteBuffer, int)} and read by
     * {@link #readLength(ByteBuffer)}.
     */
    int getLengthLength();

    void writeLength(ByteBuffer buffer, int length);

    int readLength(ByteBuffer buffer);
}
这里我们规定了ByteBuffer与PacketMessage之间的互相转化接口,具体实现写在PacketSerialization中。这里不太想赘述了,代码中已经写得很详细了。
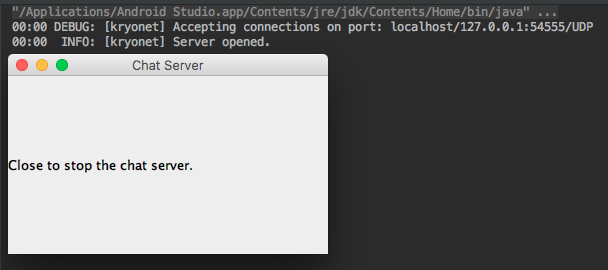
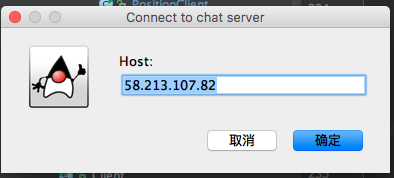
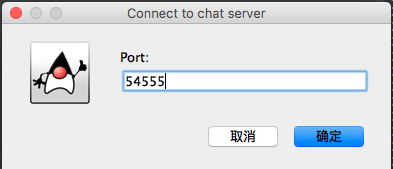
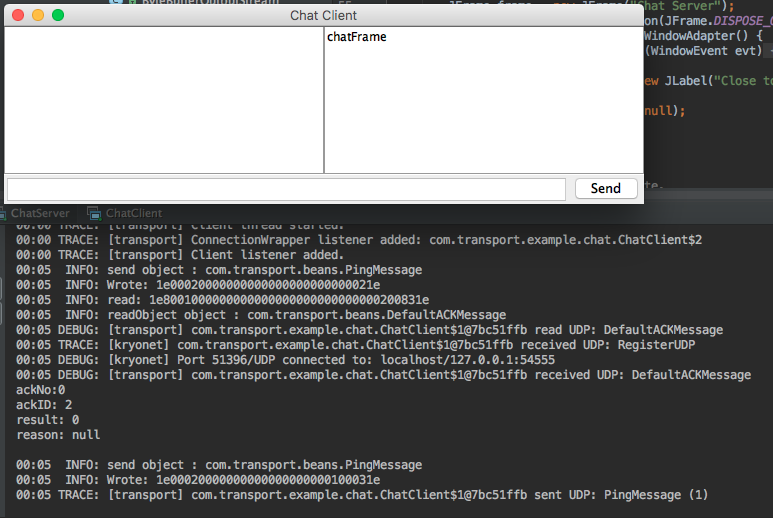
如何运行Demo
我们虽然导入Android Studio后是一个Android工程,但是不能启动模拟器来运行,因为Android部分的代码都被我删掉了。我们可以运行代码里面的ChatClient 和ChatServer两个Java勒种的main方法,运行方法不需要我再说了吧,附上截图:
学习YYModel
序列化和反序列化
相信很多人都用过类的序列化和反序列化,在Android里面有Gson等第三方库可以做到,在IOS里面有setValuesForKeysWithDictionary这个方法。但是setValuesForKeysWithDictionary这个方法只能设置键值对,遇到复杂的例如Iva对象就没办法处理了。我们都知道一个实体类里面包含的数据有两类:方法和属性,其中属性又分为基本类型、容器类型和实体(对象)类型。C++里面的基本类型就那么几种:int、float、byte等。在IOS里面如果一个实体类只包含这些基本类型,那就可以通过- (void)setValuesForKeysWithDictionary:(NSDictionary<NSString *, id>; *)keyedValues;直接将一个从json字符串中提取出来的字典转为实体类,当然你必须实现-(void)setValue:(id)value forUndefinedKey:(NSString *)key方法,以防服务器返回的字段跟你实体类定义的名字不一样。
IOS中如何处理一般实体类的序列化
前面我们说Android里面有很多第三方库可以做到,IOS也是如此:Mantle、JSONModel、FastEasyMapping、MJExtension、YYModel等等。 其中我选取了YYModel作为学习对象,因为这个库文件最少最简单,而且根据他自己的介绍来看,貌似效率挺不错。
什么是id
要对一个类序列化首先需要知道IOS里面对象的结构。我们知道C里面是没有类的,只有结构体。C++在C的结构体基础上提出了类的概念和结构,OC也是如此,OC的类就是结构体。在OC里面的对象都可以使用id类型来表示,A *a也可以写成 id a。那么id是什么呢,id在objc.h中定义如下:
//A pointer to an instance of a class.
typedef struct objc_object *id;
就像注释中所说的这样id是指向一个objc_object结构体的指针。objc_object在objc.h中的定义:
//Represents an instance of a class.
struct objc_object
{
    Class isa;
}
这个时候我们知道OBjective-C中的object在最后会被转换成C的结构体,而在这个struct中有一个isa指针,指向它的类别Class(C是大写的):
//Represents an instance of a class.
//An opaque type that represents an Objective-C class
typedef struct objc_class *Class;
我们可以看到,Class本身也是指向一个C的structobjc_class:
struct objc_class
{
    Class isa OBJC_ISA_AVAILABILITY;

    Class super_class;
    const char *name;
    long version;
    long info;
    long instance_size;
    struct objc_ivar_list *ivars;
    struct objc_method_list **methodLists;
    struct objc_cache *cache;
    struct objc_protocol_list *protocols;
};
该结构中,isa指向所属的Class,super_class指向父类别。在objc_runtime_new.h中,我们发现objc_class有如下定义:
struct object_class : objc_object
{
    //Class ISA
    Class superclass;

    ...
    ...
}
什么是Meta Class
根据上面的描述,我们可以把Meta Class理解为一个Class对象的class。简单的说:
- 当我们发送一个消息给一个NSObject对象时,这条消息会在对象类的方法列表里查找。
- 当我们发送一个消息给一个类时,这条消息会在类的Meta Class的方法列表中查找。
而Meta Class也是一个Class,它跟其他Class一样有自己的isa和super_class指针。 具体的如图所示:
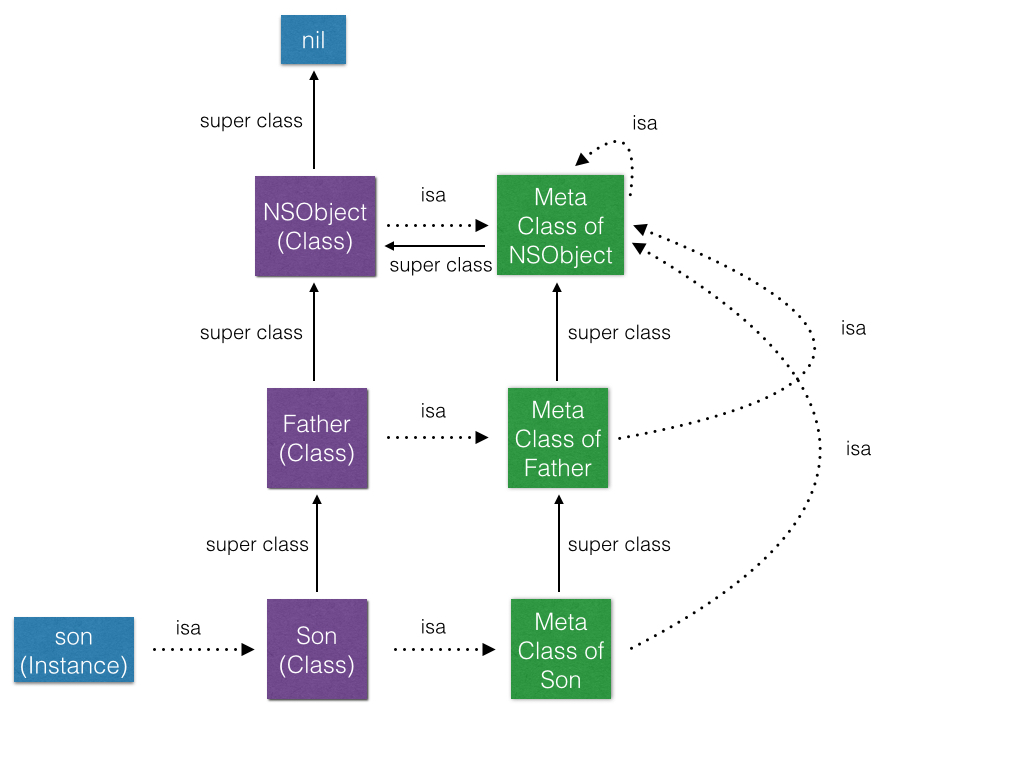
- 每个Class都有一个isa指针指向一个唯一的Meta Class
- 每一个Meta Class的isa指针都指向嘴上层的Meta Class
- 最上层的Meta Class的super class指向自己,形成一个环路
- 每一个Meta Class的super class指针指向它原本Class的 Super Class的Meta Class。但是最上层的Meta Class的 Super Class指向NSObject Class本身
- 最上层的NSObject Class的super Class指向nil。
华丽丽的分割线 其实上面说的根本没有卵用 我们来看看YYModel的序列化过程
序列化的步骤一般都是:
- 遍历类定义中的所有属性,储存在一个字典中。
- 找到所有属性对应的set和get方法,储存在一个字典里
- 确认json字典里的key和类定义中属性的映射关系,一般来说json字典里的key的名字就是我们类定义中的属性名,所以如果不需要定制化,这一步是可以省略的
- 解析需要序列化的字典,根据key和value的类型判断需要序列化的对象类型
- 根据该对象类型的属性和方法字典来实例化一个对象,并设置好值,这个就是我们要得结果了
YYModel的序列化过程也是这样,首先有一个YYClassInfo对象来储存class信息:
+ (instancetype)classInfoWithClass:(Class)cls {
    if (!cls) return nil;
    static CFMutableDictionaryRef classCache;
    static CFMutableDictionaryRef metaCache;
    static dispatch_once_t onceToken;
    static OSSpinLock lock;
    dispatch_once(&onceToken, ^{
        classCache = CFDictionaryCreateMutable(CFAllocatorGetDefault(), 0, &kCFTypeDictionaryKeyCallBacks, &kCFTypeDictionaryValueCallBacks);
        metaCache = CFDictionaryCreateMutable(CFAllocatorGetDefault(), 0, &kCFTypeDictionaryKeyCallBacks, &kCFTypeDictionaryValueCallBacks);
        lock = OS_SPINLOCK_INIT;
    });
    OSSpinLockLock(&lock);
    YYClassInfo *info = CFDictionaryGetValue(class_isMetaClass(cls) ? metaCache : classCache, (__bridge const void *)(cls));
    if (info && info->_needUpdate) {
        [info _update];
    }
    OSSpinLockUnlock(&lock);
    if (!info) {
        info = [[YYClassInfo alloc] initWithClass:cls];
        if (info) {
            OSSpinLockLock(&lock);
            CFDictionarySetValue(info.isMeta ? metaCache : classCache, (__bridge const void *)(cls), (__bridge const void *)(info));
            OSSpinLockUnlock(&lock);
        }
    }
    return info;
}
可以看到所有出现的class定义都会储存在一个全局静态字典classCache和metaCache中。我们再看一个YYClassInfo包含那些数据呢:
/**
 Class information for a class.
 */
@interface YYClassInfo : NSObject
@property (nonatomic, assign, readonly) Class cls;
@property (nonatomic, strong, readonly) Class superCls;
@property (nonatomic, assign, readonly) Class metaCls;
@property (nonatomic, assign, readonly) BOOL isMeta;
@property (nonatomic, strong, readonly) NSString *name;
@property (nonatomic, strong, readonly) YYClassInfo *superClassInfo;
@property (nonatomic, strong, readonly) NSDictionary *ivarInfos;     //< key:NSString(ivar),     value:YYClassIvarInfo
@property (nonatomic, strong, readonly) NSDictionary *methodInfos;   //< key:NSString(selector), value:YYClassMethodInfo
@property (nonatomic, strong, readonly) NSDictionary *propertyInfos; //< key:NSString(property), value:YYClassPropertyInfo
@end
/**
 Instance variable information.
 */
@interface YYClassIvarInfo : NSObject
@property (nonatomic, assign, readonly) Ivar ivar;
@property (nonatomic, strong, readonly) NSString *name; //< Ivar's name
@property (nonatomic, assign, readonly) ptrdiff_t offset; //< Ivar's offset
@property (nonatomic, strong, readonly) NSString *typeEncoding; //< Ivar's type encoding
@property (nonatomic, assign, readonly) YYEncodingType type; //< Ivar's type
@end
/**
 Method information.
 */
@interface YYClassMethodInfo : NSObject
@property (nonatomic, assign, readonly) Method method;
@property (nonatomic, strong, readonly) NSString *name; //< method name
@property (nonatomic, assign, readonly) SEL sel; //< method's selector
@property (nonatomic, assign, readonly) IMP imp; //< method's implementation
@property (nonatomic, strong, readonly) NSString *typeEncoding; //< method's parameter and return types
@property (nonatomic, strong, readonly) NSString *returnTypeEncoding; //< return value's type
@property (nonatomic, strong, readonly) NSArray *argumentTypeEncodings; //< array of arguments' type
@end
/**
 Property information.
 */
@interface YYClassPropertyInfo : NSObject
@property (nonatomic, assign, readonly) objc_property_t property;
@property (nonatomic, strong, readonly) NSString *name; //< property's name
@property (nonatomic, assign, readonly) YYEncodingType type; //< property's type
@property (nonatomic, strong, readonly) NSString *typeEncoding; //< property's encoding value
@property (nonatomic, strong, readonly) NSString *ivarName; //< property's ivar name
@property (nonatomic, assign, readonly) Class cls; //< may be nil
@property (nonatomic, strong, readonly) NSString *getter; //< getter (nonnull)
@property (nonatomic, strong, readonly) NSString *setter; //< setter (nonnull)
@end
我只截取了属性定义的部分。YYClassInfo储存了一个类里面所有的属性和方法字典,并保存了_cls、_superCls和_metaCls的签名。 主要使用了OC的class_copyMethodList、class_copyPropertyList和class_copyIvarList方法,动过cls签名获取了类的信息。 当然,说起来好像很简单,实际需要你对OC的底层非常了解,知道objc_method、objc_ivar和objc_property的定义,知道Type Encodings和Declared Properties这些信息,才能真的解析出我们需要的信息。 这里我找到了OC里面关于上面那些结构体的定义:
类的数据结构

Class(指针)

typedef struct objc_class *Class;

/*
  这是由编译器为每个类产生的数据结构,这个结构定义了一个类.这个结构是通过编译器在执行时产生,在运行时发送消息时使用.因此,一些成员改变了类型.编译器产生"char* const"类型的字符串指针替代了下面的成员变量"super_class"
*/
struct objc_class {
  struct objc_class*  class_pointer;    /* 指向元类的指针. */
  struct objc_class*  super_class;      /* 指向父类的指针. 对于NSObject来说是NULL.*/
  const char*         name;             /* 类的名称. */
  long                version;          /* 未知. */
  unsigned long       info;             /* 比特蒙板.  参考下面类的蒙板定义. */
  long                instance_size;    /* 类的字节数.包含类的定义和所有父类的定义 */
#ifdef _WIN64
  long pad;
#endif
  struct objc_ivar_list* ivars;         /* 指向类中定义的实例变量的列表结构. NULL代表没有实例变量.不包括父类的变量. */
  struct objc_method_list*  methods;    /* 链接类中定义的实例方法. */
  struct sarray *    dtable;            /* 指向实例方法分配表. */
  struct objc_class* subclass_list;     /* 父类列表 */
  struct objc_class* sibling_class;
  struct objc_protocol_list *protocols; /* 要实现的原型列表 */
  void* gc_object_type;
};
Method(指针)

typedef struct objc_method *Method;

/* 编译器依据类中定义的方法为该类产生一个或更多这种这种结构.
    一个类的实现可以分散在一个文件中不同部分,同时类别可以分散在不同的模块中.为了处理这个问题,使用一个单独的方法链表 */
struct objc_method
{
  SEL         method_name;  /* 这个变量就是方法的名称.编译器使用在这里使用一个`char*`,当一个方法被注册,名称在运行时被使用真正的SEL替代  */
  const char* method_types; /* 描述方法的参数列表. 在运行时注册选择器时使用.那时候方法名就会包含方法的参数列表.*/
  IMP         method_imp;   /* 方法执行时候的地址. */
};
Ivar(指针)

typedef struct objc_ivar *Ivar;

/* 编译器依据类中定义的实例变量为该类产生一个或更多这种这种结构  */
struct objc_ivar
{
  const char* ivar_name;  /* 类中定义的变量名. */
  const char* ivar_type;  /* 描述变量的类型.调试时非常有用. */
  int        ivar_offset; /* 实例结构的基地址偏移字节 */
};
Category(指针)

typedef struct objc_category *Category;

/* 编译器为每个类别产生一个这样的结构.一个类可以具有多个类别同时既包括实例方法,也可以包括类方法*/
struct objc_category
{
  const char*   category_name;                /* 类别名.定义在类别后面的括号内*/
  const char*   class_name;                   /* 类名 */
  struct objc_method_list  *instance_methods; /* 链接类中定义的实例方法. NULL表示没有实例方法. */
  struct objc_method_list *class_methods;     /* 链接类中定义的类方法. NULL表示没有类方法. */
  struct objc_protocol_list *protocols;       /* 遵循的协议表  */
};
objc_property_t

typedef struct objc_property *objc_property_t;
IMP

id (*IMP)(id, SEL, ...)
SEL

typedef struct objc_selector *SEL;

struct objc_selector
{
  void *sel_id;
  const char *sel_types;
};
objc_method_list

struct objc_method_list
{
  struct objc_method_list*  method_next; /* 这个变量用来链接另一个单独的方法链表 */
  int            method_count;            /* 结构中定义的方法数量 */
  struct objc_method method_list[1];      /* 可变长度的结构 */
};
objc_cache

struct objc_cache
{
    unsigned int mask;
    unsigned int occupied;
    Method buckets[1];
};
objc_protocol_list

struct objc_protocol_list
{
  struct objc_protocol_list *next;
  size_t count;
  struct objc_protocol *list[1];
};
实例的数据结构

id

typedef struct objc_object *id;
objc_object

struct objc_object
{
  /* 类的指针是对象相关的类.如果是一个类对象, 这个指针指向元类.
  Class isa;
};
objc_super

struct objc_super
{
  id    self;        /* 消息的接受者  */
  Class super_class; /* 接受者的父类  */
};
有了上面这些信息相信所有人都知道作者的代码都在干嘛了,具体不表。反正到此为止,我们已经有了class的定义。 理论上下一步就可以解析了,但是作者额外多了一步,定制了映射关系。出现了一个新的class属性映射关系类的定义:
//A class info in object model.
@interface _YYModelMeta : NSObject {
@public
    // Key:mapped key and key path, Value:_YYModelPropertyInfo.
    NSDictionary *_mapper;
    // Array<_YYModelPropertyInfo>, all property meta of this model.
    NSArray *_allPropertyMetas;
    // Array<_YYModelPropertyInfo>, property meta which is mapped to a key path.
    NSArray *_keyPathPropertyMetas;
    // The number of mapped key (and key path), same to _mapper.count.
    NSUInteger _keyMappedCount;
    // Model class type.
    YYEncodingNSType _nsType;

    BOOL _hasCustomTransformFromDictonary;
    BOOL _hasCustomTransformToDictionary;
}
@end
上面的YYClassInfo更像是一个抽象的模板,只是告诉我们类里面有这些属性和方法,没有告诉我们怎么去解析。_YYModelMeta这个类就是告诉我们怎么去解析的。 同样的所有_YYModelMeta都缓存在了一个全局静态字典里面。_YYModelMeta通过YYClassInfo的信息来实例化:
- (instancetype)initWithClass:(Class)cls {
    YYClassInfo *classInfo = [YYClassInfo classInfoWithClass:cls];
    if (!classInfo) return nil;
    self = [super init];

    // Get black list
    NSSet *blacklist = nil;
    if ([cls respondsToSelector:@selector(modelPropertyBlacklist)]) {
        NSArray *properties = [(id<YYModel>)cls modelPropertyBlacklist];
        if (properties) {
            blacklist = [NSSet setWithArray:properties];
        }
    }

    // Get white list
    NSSet *whitelist = nil;
    if ([cls respondsToSelector:@selector(modelPropertyWhitelist)]) {
        NSArray *properties = [(id<YYModel>)cls modelPropertyWhitelist];
        if (properties) {
            whitelist = [NSSet setWithArray:properties];
        }
    }

    // Get container property's generic class
    NSDictionary *genericMapper = nil;
    if ([cls respondsToSelector:@selector(modelContainerPropertyGenericClass)]) {
        genericMapper = [(id<YYModel>)cls modelContainerPropertyGenericClass];
        if (genericMapper) {
            NSMutableDictionary *tmp = genericMapper.mutableCopy;
            [genericMapper enumerateKeysAndObjectsUsingBlock:^(id key, id obj, BOOL *stop) {
                if (![key isKindOfClass:[NSString class]]) return;
                Class meta = object_getClass(obj);
                if (!meta) return;
                if (class_isMetaClass(meta)) {
                    tmp[key] = obj;
                } else if ([obj isKindOfClass:[NSString class]]) {
                    Class cls = NSClassFromString(obj);
                    if (cls) {
                        tmp[key] = cls;
                    }
                }
            }];
            genericMapper = tmp;
        }
    }

    // Create all property metas.
    NSMutableDictionary *allPropertyMetas = [NSMutableDictionary new];
    YYClassInfo *curClassInfo = classInfo;
    while (curClassInfo && curClassInfo.superCls != nil) { // recursive parse super class, but ignore root class (NSObject/NSProxy)
        for (YYClassPropertyInfo *propertyInfo in curClassInfo.propertyInfos.allValues) {
            if (!propertyInfo.name) continue;
            if (blacklist && [blacklist containsObject:propertyInfo.name]) continue;
            if (whitelist && ![whitelist containsObject:propertyInfo.name]) continue;
            _YYModelPropertyMeta *meta = [_YYModelPropertyMeta metaWithClassInfo:classInfo
                                                                    propertyInfo:propertyInfo
                                                                         generic:genericMapper[propertyInfo.name]];
            if (!meta || !meta->_name) continue;
            if (!meta->_getter && !meta->_setter) continue;
            if (allPropertyMetas[meta->_name]) continue;
            allPropertyMetas[meta->_name] = meta;
        }
        curClassInfo = curClassInfo.superClassInfo;
    }
    if (allPropertyMetas.count) _allPropertyMetas = allPropertyMetas.allValues.copy;

    // create mapper
    NSMutableDictionary *mapper = [NSMutableDictionary new];
    NSMutableArray *keyPathPropertyMetas = [NSMutableArray new];
    if ([cls respondsToSelector:@selector(modelCustomPropertyMapper)]) {
        NSDictionary *customMapper = [(id <YYModel>)cls modelCustomPropertyMapper];
        [customMapper enumerateKeysAndObjectsUsingBlock:^(NSString *propertyName, NSString *mappedToKey, BOOL *stop) {
            _YYModelPropertyMeta *propertyMeta = allPropertyMetas[propertyName];
            if (propertyMeta) {
                NSArray *keyPath = [mappedToKey componentsSeparatedByString:@"."];
                propertyMeta->_mappedToKey = mappedToKey;
                if (keyPath.count > 1) {
                    propertyMeta->_mappedToKeyPath = keyPath;
                    [keyPathPropertyMetas addObject:propertyMeta];
                }
                [allPropertyMetas removeObjectForKey:propertyName];
                if (mapper[mappedToKey]) {
                    ((_YYModelPropertyMeta *)mapper[mappedToKey])->_next = propertyMeta;
                } else {
                    mapper[mappedToKey] = propertyMeta;
                }
            }
        }];
    }
    [allPropertyMetas enumerateKeysAndObjectsUsingBlock:^(NSString *name, _YYModelPropertyMeta *propertyMeta, BOOL *stop) {
        propertyMeta->_mappedToKey = name;
        if (mapper[name]) {
            ((_YYModelPropertyMeta *)mapper[name])->_next = propertyMeta;
        } else {
            mapper[name] = propertyMeta;
        }
    }];

    if (mapper.count) _mapper = mapper;
    if(keyPathPropertyMetas) _keyPathPropertyMetas = keyPathPropertyMetas;
    _keyMappedCount = _allPropertyMetas.count;
    _nsType = YYClassGetNSType(cls);
    _hasCustomTransformFromDictonary = ([cls instancesRespondToSelector:@selector(modelCustomTransformFromDictionary:)]);
    _hasCustomTransformToDictionary = ([cls instancesRespondToSelector:@selector(modelCustomTransformToDictionary:)]);

    return self;
}
翻译成伪代码就是:
- 1.获取属性的白名单、黑名单和解析的key-value映射表。
- 2.根据这些信息生成Json字典里的key和类定义中的映射关系,保存在一个map中。
白名单的作用就是如果存在白名单则在实例化的时候只管白名单里面的属性,_YYModelMeta里面也只保存白名单里面的属性映射。黑名单的作用就是过滤掉黑名单里面的属性,其他的属性映射都保存。 当然一般简单地序列化是不需要这些个定制化的东西的,作者还额外实现了一些特殊属性的特殊映射关系,比如一些类定义里面的字典或者数组该如何实例化,我们就需要知道这些数组和字典里面储存的是 什么类型的value,作者通过modelContainerPropertyGenericClass这个接口,让用户自己来设置。作者还额外提供了一个接口modelCustomPropertyMapper,顾名思义,某些属性的名字跟 json字典中的key不一样或者本身就需要映射到跟属性不同名的key上,用户就可以通过这个接口返回一个字典来设置:
/**
 Custom property mapper.

 @discussion If the key in JSON/Dictionary does not match to the model's property name,
 implements this method and returns the additional mapper.

 Example:

    json:
        {
            "n":"Harry Pottery",
            "p": 256,
            "ext" : {
                "desc" : "A book written by J.K.Rowing."
            }
        }

    model:
        @interface YYBook : NSObject
        @property NSString *name;
        @property NSInteger page;
        @property NSString *desc;
        @end

        @implementation YYBook
        + (NSDictionary *)modelCustomPropertyMapper {
            return @{@"name" : @"n",
                     @"page" : @"p",
                     @"desc" : @"ext.desc"};
        }
        @end

 @return A custom mapper for properties.
 */
+ (NSDictionary *)modelCustomPropertyMapper;
在生成映射表的时候有个问题,那就是一个key只能对应一个value,加入类A中的属性B、C都要对应到json字典中的KeyB字段,则这个映射表是没办法实现的, 这也是为什么作者在_YYModelPropertyMeta的定义中添加_YYModelPropertyMeta *_next;这个属性。_YYModelPropertyMeta的完整定义如下:
// A property info in object model.
@interface _YYModelPropertyMeta : NSObject {
@public
    NSString *_name;             //< property's name
    YYEncodingType _type;        //< property's type
    YYEncodingNSType _nsType;    //< property's Foundation type
    BOOL _isCNumber;             //< is c number type
    Class _cls;                  //< property's class, or nil
    Class _genericCls;           //< container's generic class, or nil if threr's no generic class
    SEL _getter;                 //< getter, or nil if the instances cannot respond
    SEL _setter;                 //< setter, or nil if the instances cannot respond

    NSString *_mappedToKey;      //< the key mapped to
    NSArray *_mappedToKeyPath;   //< the key path mapped to (nil if the name is not key path)
    _YYModelPropertyMeta *_next; //< next meta if there are multiple properties mapped to the same key.
}
@end
我们已经知道了YYClassInfo和_YYModelMeta的关系,那么_YYModelPropertyMeta和YYClassPropertyInfo是什么关系呢?我们看到YYClassPropertyInfo中 保存的是属性的原始模板信息,而且代码里有一段:
_YYModelPropertyMeta *meta = [_YYModelPropertyMeta metaWithClassInfo:classInfo
                                                                    propertyInfo:propertyInfo
                                                                         generic:genericMapper[propertyInfo.name]];
可以看到_YYModelPropertyMeta是通过YYClassPropertyInfo模板生成的,_YYModelPropertyMeta里面保存的信息相对于YYClassPropertyInfo来说更少也更针对, _YYModelPropertyMeta把YYClassPropertyInfo中的get和set方法名转化成了SEL类型的对象,我学OC时间不长,也不知道该怎么称呼SEL对象,叫方法选择器?Whatever。。。 习惯了C++的朋友直接理解成函数地址也行,习惯了Window的消息分发机制的也可以理解为接受消息的对象,反正得到这个之后想要设置属性的值就只需要调用OC的发送消息接口就行了,比如下面的代码:
/**
 Set number to property.
 @discussion Caller should hold strong reference to the parameters before this function returns.
 @param model Should not be nil.
 @param num   Can be nil.
 @param meta  Should not be nil, meta.isCNumber should be YES, meta.setter should not be nil.
 */
static force_inline void ModelSetNumberToProperty(__unsafe_unretained id model,
                                                  __unsafe_unretained NSNumber *num,
                                                  __unsafe_unretained _YYModelPropertyMeta *meta) {
    switch (meta->_type & YYEncodingTypeMask) {
        case YYEncodingTypeBool: {
            ((void (*)(id, SEL, bool))(void *) objc_msgSend)((id)model, meta->_setter, num.boolValue);
        } break;
        case YYEncodingTypeInt8: {
            ((void (*)(id, SEL, int8_t))(void *) objc_msgSend)((id)model, meta->_setter, (int8_t)num.charValue);
        } break;
        case YYEncodingTypeUInt8: {
            ((void (*)(id, SEL, uint8_t))(void *) objc_msgSend)((id)model, meta->_setter, (uint8_t)num.unsignedCharValue);
        } break;
        case YYEncodingTypeInt16: {
            ((void (*)(id, SEL, int16_t))(void *) objc_msgSend)((id)model, meta->_setter, (int16_t)num.shortValue);
        } break;
        case YYEncodingTypeUInt16: {
            ((void (*)(id, SEL, uint16_t))(void *) objc_msgSend)((id)model, meta->_setter, (uint16_t)num.unsignedShortValue);
        } break;
        case YYEncodingTypeInt32: {
            ((void (*)(id, SEL, int32_t))(void *) objc_msgSend)((id)model, meta->_setter, (int32_t)num.intValue);
        }
        case YYEncodingTypeUInt32: {
            ((void (*)(id, SEL, uint32_t))(void *) objc_msgSend)((id)model, meta->_setter, (uint32_t)num.unsignedIntValue);
        } break;
        case YYEncodingTypeInt64: {
            ((void (*)(id, SEL, int64_t))(void *) objc_msgSend)((id)model, meta->_setter, (int64_t)num.longLongValue);
        }
        case YYEncodingTypeUInt64: {
            ((void (*)(id, SEL, uint64_t))(void *) objc_msgSend)((id)model, meta->_setter, (uint64_t)num.unsignedLongLongValue);
        } break;
        case YYEncodingTypeFloat: {
            float f = num.floatValue;
            if (isnan(f) || isinf(f)) f = 0;
            ((void (*)(id, SEL, float))(void *) objc_msgSend)((id)model, meta->_setter, f);
        } break;
        case YYEncodingTypeDouble: {
            double d = num.floatValue;
            if (isnan(d) || isinf(d)) d = 0;
            ((void (*)(id, SEL, double))(void *) objc_msgSend)((id)model, meta->_setter, d);
        } break;
        case YYEncodingTypeLongDouble: {
            double d = num.floatValue;
            if (isnan(d) || isinf(d)) d = 0;
            ((void (*)(id, SEL, long double))(void *) objc_msgSend)((id)model, meta->_setter, (long double)d);
        } break;
        default: break;
    }
}
当然_YYModelPropertyMeta跟YYClassPropertyInfo的关系也是一个我们解析时使用的映射表,一个只是属性模板。 到这里我不产生了疑问:YYClassIvarInfo和YYClassMethodInfo对应的映射表呢?YYClassMethodInfo不需要映射,因为他不是属性,不需要赋值,但是YYClassIvarInfo 就不一样了,他表示一个实例变量。但是我们看作者的代码里前前后后好像就没YYClassIvarInfo的事儿。什么才是实例变量呢?一个类里面的实例变量是什么呢?不是属性么?一大串问号。。。。。 我们都知道OC的定义可以像下面这么写:
@interface A : NSObject{
    NSString *_name;
}
@property (nonatomic, strong) NSString *name;
@end
@implementation A
@synthesize name = _name;
@end
或者:
@interface A : NSObject{
    NSString *name;
}
@property (nonatomic, strong) NSString *name;
@implementation A
@synthesize name;
@end
或者
@interface A : NSObject
@property (nonatomic, strong) NSString *name;
@implementation A
@synthesize name;
@end
区别是什么呢?看知乎大神的回答:
著作权归作者所有。 商业转载请联系作者获得授权,非商业转载请注明出处。 作者:RefuseBT 链接:http://www.zhihu.com/question/22195598/answer/39593235 来源:知乎
对于方式1,定义最完备。继承时,子类直接访问父类成员变量无需再@synthesize。缺点就是麻烦,重构也麻烦。第二种的问题,在于成员变量没有下划线。这个修改的好处你可能一开始体会不到。其实加下划线最大的好处在于局部变量命名不会冲突。比如你一个成员变量叫name,你的入参也叫name,就会出现覆盖。这个时候简便的办法是对name加冠词,比如aName、anObj,看起来还是挺恶心的。虽然OC也这样干。这个时候如果声明为_name就一劳永逸了,况且编译器还能替你做了这个事。第三种的问题,也是第一种的优势,就是你在父类中可以直接访问成员变量,但是子类中你无法访问,只能通过属性访问到。如果属性还是在.m中声明的,麻烦更多。另外从命名上还兼有第二种的缺陷。 那么最好的写法写法一: @interface Person : NSObject { } @property (nonatomic, strong) NSString *name; @end
@implementation Person @end 这个适用与一般情况,编译器自动生成成员变量_name,而且写法最简单,不必重复声明。写法二,针对继承情况下,向子类暴露父类成员变量:@interface Person : NSObject { NSString *_name; } @property (nonatomic, strong) NSString *name; @end
@implementation Person @synthesize name = _name; @end 其实@synthesize那条你不写也行,不过我还是喜欢声明完备,毕竟同一个成员变量,两个地方声明。
OK,这下我们知道了其实我们上面说的属性和实例变量基本就是一个东西了。但是我们一个属性对象YYClassPropertyInfo只是包含了get和set方法的名字以及属性名等一些基本信息。YYClassIvarInfo里面最特殊的就是@property (nonatomic, assign, readonly) ptrdiff_t offset; //< Ivar’s offset这个属性了。 学过C的都知道,所有数据的访问最后都是要转化为地址的,一个char[10]数组要访问第8个数据,就要知道第发布数据的地址,offset就相当于实例变量的地址索引。offset加上首地址就得到了实例变量的地址。但是我不得不说作者把这些数据保存下来之后貌似并没有使用。。。。。。
Anyway,我们已经得到了如何解析的映射表,愉快的进入了下一个步骤,解析Json数据。 作者在解析前加了很多道防线,防止用户传入的数据格式错误,不是一个字典或者jsonData类型的数据,这些这里就不表了。解析代码如下:
- (BOOL)yy_modelSetWithDictionary:(NSDictionary *)dic {
    if (!dic || dic == (id)kCFNull) return NO;
    if (![dic isKindOfClass:[NSDictionary class]]) return NO;

    _YYModelMeta *modelMeta = [_YYModelMeta metaWithClass:object_getClass(self)];
    if (modelMeta->_keyMappedCount == 0) return NO;
    ModelSetContext context = {0};
    context.modelMeta = (__bridge void *)(modelMeta);
    context.model = (__bridge void *)(self);
    context.dictionary = (__bridge void *)(dic);

    if (modelMeta->_keyMappedCount >= CFDictionaryGetCount((CFDictionaryRef)dic)) {
        CFDictionaryApplyFunction((CFDictionaryRef)dic, ModelSetWithDictionaryFunction, &context);
        if (modelMeta->_keyPathPropertyMetas) {
            CFArrayApplyFunction((CFArrayRef)modelMeta->_keyPathPropertyMetas,
                                 CFRangeMake(0, CFArrayGetCount((CFArrayRef)modelMeta->_keyPathPropertyMetas)),
                                 ModelSetWithPropertyMetaArrayFunction,
                                 &context);
        }
    } else {
        CFArrayApplyFunction((CFArrayRef)modelMeta->_allPropertyMetas,
                             CFRangeMake(0, modelMeta->_keyMappedCount),
                             ModelSetWithPropertyMetaArrayFunction,
                             &context);
    }

    if (modelMeta->_hasCustomTransformFromDictonary) {
        return [((id<YYModel>)self) modelCustomTransformFromDictionary:dic];
    }
    return YES;
}
很简单,如果我们的映射表中的key超过了提供的json字典中的key的个数,我们就认为有些字段是不要设置值的,所以对json字典进行遍历,反之就对映射表进行遍历。 最后如果我们有一些自定义的转化规则,在最后调用用户自己写的modelCustomTransformFromDictionary方法。至此YYModel的解析就结束了
总结
YYModel的作者真的是一个大神,我真心佩服这样的一个90后(同为90的我惭愧不已),他写了很多开源的第三方库,而这些第三方库都是他在这两年内通公司项目总结等归纳出来的, 其中有很多很强大的YYText等控件(解决了文字竖排的问题,也是我下一个要学习的库)也得到了很多人的关注。其中YYModel只是这位大神利用业余时间2周写出来的随笔。。。。我 花了近1一个月时间才勉强弄懂了七八分,要让我自己写那是万万不能的。一个阶段的学习计划应该是先把YYModel再重新吃一边,直到吃透了,然后花两周时间默写出来。。。 然后在学习大神的YYText库,丰富我之前写的可怜的CoreText库(相比之下我这个简直不能叫库)。。。。。

CoreTextView
如何实现一个轻量级的竖排文字显示控件
感谢卢克的博客和代码,给了我很多帮助和启发。卢克的博客里详细介绍了如何使用Core Text来绘制富文本,而且展示了苹果如何处理字体的分解图,加上苹果官方的demo,最终我拼凑出来一个竖排显示文字的控件。
竖排显示文字的核心思想
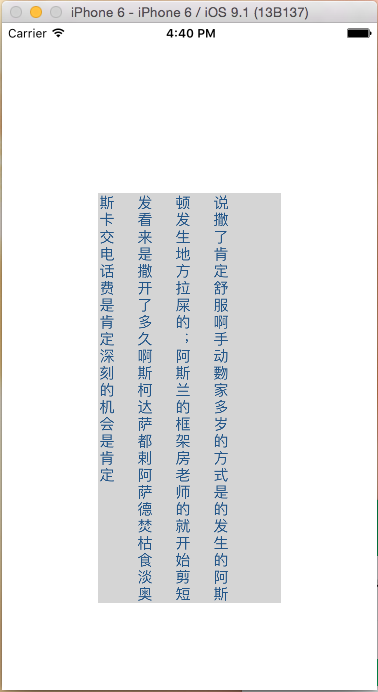
说起来很简单,可能大家也都看到过,其实在IOS的富文本属性中有两个不常用的属性:NSWritingDirectionAttributeName和NSVerticalGlyphFormAttributeName。 故名思议NSVerticalGlyphFormAttributeName就是控制文字竖向还是横向绘制,而NSWritingDirectionAttributeName控制的是文本绘制方向。 下面就很简单了,只需要把NSVerticalGlyphFormAttributeName设置为1(0 means horizontal text. 1 indicates vertical text.),NSWritingDirectionAttributeName设置为 @[@(NSWritingDirectionRightToLeft)],理论上就能实现一个古文风格的竖排显示效果了。
于是我满心欢喜的构建了一个富文本对象,并添加了这两个属性,然后发现并没有任何卵用。首先是NSVerticalGlyphFormAttributeName只针对英文起作用,其次NSVerticalGlyphFormAttributeName并没有改变绘制的方向。 这里我需要拎清楚两个概念:我在上面说NSWritingDirectionAttributeName控制的是文本绘制方向意思是文本从左到右绘制或者从右到左,这个我称之为文本绘制方向;我说NSVerticalGlyphFormAttributeName并没有改变绘制的方向 意思是把文字渲染到屏幕的方向。
在我设置了NSVerticalGlyphFormAttributeName之后,文本里面的字母顺时针旋转了90°,变成了竖向显示,但是整个文本还是一行。也许有人就会想直接把控件旋转90°不就行了么,对于单行文本 这种做法确实是最简单有效地,但是需要绘制多行文本的时候,这个方法就很难控制了。你需要创建多个UILabel并设置他们的坐标、宽高等等,还需要自己切分文本,分段显示。。。听起来就觉得不可能实现。。
偶然的机会,我在stackoverflow上看到一个提问,贴了一段代码,居然能实现了文本行变列,他提的问题是如何能使汉字和英文字符高度整体居中对齐。这种感觉就像是我还在解决温饱问题 而人家开始像怎么找乐子了。。。于是我那段代码扒了下来仔细研究了下。最核心的部分分为两个:
1.创建CTFrameRef的时候需要添加一个属性kCTFrameProgressionAttributeName
/*!
	@const		kCTFrameProgressionAttributeName
	@abstract	Specifies progression for a frame.

	@discussion Value must be a CFNumberRef containing a CTFrameProgression.
				Default is kCTFrameProgressionTopToBottom. This value determines
				the line stacking behavior for a frame and does not affect the
				appearance of the glyphs within that frame.

	@seealso	CTFramesetterCreateFrame
*/
CTFrameRef frame = CTFramesetterCreateFrame(framesetter,
                                            CFRangeMake(0, 0),
                                            path,
                                            (CFDictionaryRef)@{(id)kCTFrameProgressionAttributeName: @(kCTFrameProgressionRightToLeft)});
/*!
@enum CTFrameProgression
@abstract These constants specify frame progression types.
@discussion The lines of text within a frame may be stacked for either
horizontal or vertical text. Values are enumerated for each
stacking type supported by CTFrame. Frames created with a
progression type specifying vertical text will rotate lines
90 degrees counterclockwise when drawing.
@constant kCTFrameProgressionTopToBottom
Lines are stacked top to bottom for horizontal text.
@constant kCTFrameProgressionRightToLeft
Lines are stacked right to left for vertical text.
@constant kCTFrameProgressionLeftToRight
Lines are stacked left to right for vertical text.
*/
typedef CF_ENUM(uint32_t, CTFrameProgression) {
kCTFrameProgressionTopToBottom = 0,
kCTFrameProgressionRightToLeft = 1,
kCTFrameProgressionLeftToRight = 2
}至此我们就能控制文本的行变列。
2.让汉字保持竖向
添加了kCTFrameProgressionAttributeName属性后其实就相当于把绘制区域顺时针旋转了90°,汉字躺下了。。。因此我们需要为每个汉字额外设置一些样式:
/*!
    @const      kCTVerticalFormsAttributeName
    @abstract   Controls glyph orientation.

    @discussion Value must be a CFBooleanRef. Default is false. A value of false
                indicates that horizontal glyph forms are to be used, true
                indicates that vertical glyph forms are to be used.
*/

extern const CFStringRef kCTVerticalFormsAttributeName CT_AVAILABLE(10_5, 4_3);
NSMutableAttributedString *attrStr = [[NSMutableAttributedString alloc] initWithString:self.text attributes:nil];

for (int i = 0; i < attrStr.length; i++) {
    if ([self isChinese:self.text index:i]) {
        [attrStr addAttribute:(id)kCTVerticalFormsAttributeName
                        value:@YES
                        range:NSMakeRange(i, 1)];
    }
}
这两步处理完之后我们的文本就能够竖向显示了,只是字母跟汉字不会右对齐。但是到这里我们才刚开始。
如何才能让文本居中显示?
使用Core Text绘制文本主要有
1.获取画布并设置好坐标系
//获取画布句柄
CGContextRef context = UIGraphicsGetCurrentContext();
//颠倒窗口 坐标计算使用的mac下的坐标系 跟ios的坐标系正好颠倒
CGContextSetTextMatrix(context, CGAffineTransformIdentity);
CGContextTranslateCTM(context, 0, self.bounds.size.height);
CGContextScaleCTM(context, 1.0, -1.0);
2.生成需要绘制的内容
//生成富文本的信息 具体不懂  反正这是core text绘制的必须流程和对象
CTFramesetterRef framesetter = CTFramesetterCreateWithAttributedString((__bridge CFAttributedStringRef)self.attributedText);
这里的attributedText就是一个富文本对象,我们可以设置行间距、字间距、颜色和字体等等一系列属性。
3.生成绘制区域
//这一步生成合适的绘制区域
CGPathRef path = [self createPathWithLines];
createPathWithLines方法我们后面要讲,最简单的实现就是把整个self.bound作为绘制区域,就跟卢克的博客里写的一样
4.绘制
// Create a frame for this column and draw it.
CTFrameRef frame = CTFramesetterCreateFrame(framesetter,
                                            CFRangeMake(0, 0),
                                            path,</br>
                                            (CFDictionaryRef)@{(id)kCTFrameProgressionAttributeName: @(kCTFrameProgressionRightToLeft)});
CTFrameDraw(frame, context);
5.释放内存
//释放内存
CFRelease(frame);
CFRelease(path);
CFRelease(framesetter);
由此可见想要实现居中显示,我们只需要计算出正确的绘制区域就行了。其实不光是居中,你想要啥对齐效果都可以通过设置绘制区域来达到。 计算绘制区域的方法可以参见我的代码都有详细的注释。
处理横竖屏切换
这个很简单,横竖屏切换会触发layoutSubviews方法,在layoutSubviews方法里重绘即可。